
Set up your page
Claim your address, say who you are, add your first links and publish — the whole first pass, in about ten minutes.
Claim your address
Your page lives at mylink.is/yourname, and the name is the first thing you choose. Pick the one you would say out loud — the handle people already know you by beats anything cleverer, because this is going in a bio where nobody reads carefully.
Choose it deliberately, because it is the one thing on the page you cannot change later. The address is what everything is filed under, so renaming it would break every link already printed and split your numbers across two names. If you outgrow it, you make a second page rather than rename this one.
Say who you are
The first time you sign in, the studio offers to do this part for you. Start from a design opens a gallery of real pages, one per line of work — a barber shop, a restaurant, a photographer — each with its own colours, its cover photograph and the buttons that trade actually needs. The words and the picture are placeholders; the buttons have no addresses in them yet. Pick the nearest, tick off the social accounts you have — the first few are the ones that trade tends to use, and Add another has the rest of the list — and you land in the editor with a page to change rather than a blank one to fill. Nothing it makes is special: it is an ordinary page. The rest of this guide is the same job done by hand, which is the other door on that screen.
Open Design and fill in the header: a title, a line about what you do, and a picture. This is the part a visitor reads before they decide whether to scroll, so write the line for somebody who has never heard of you — what you do and where, not a slogan.
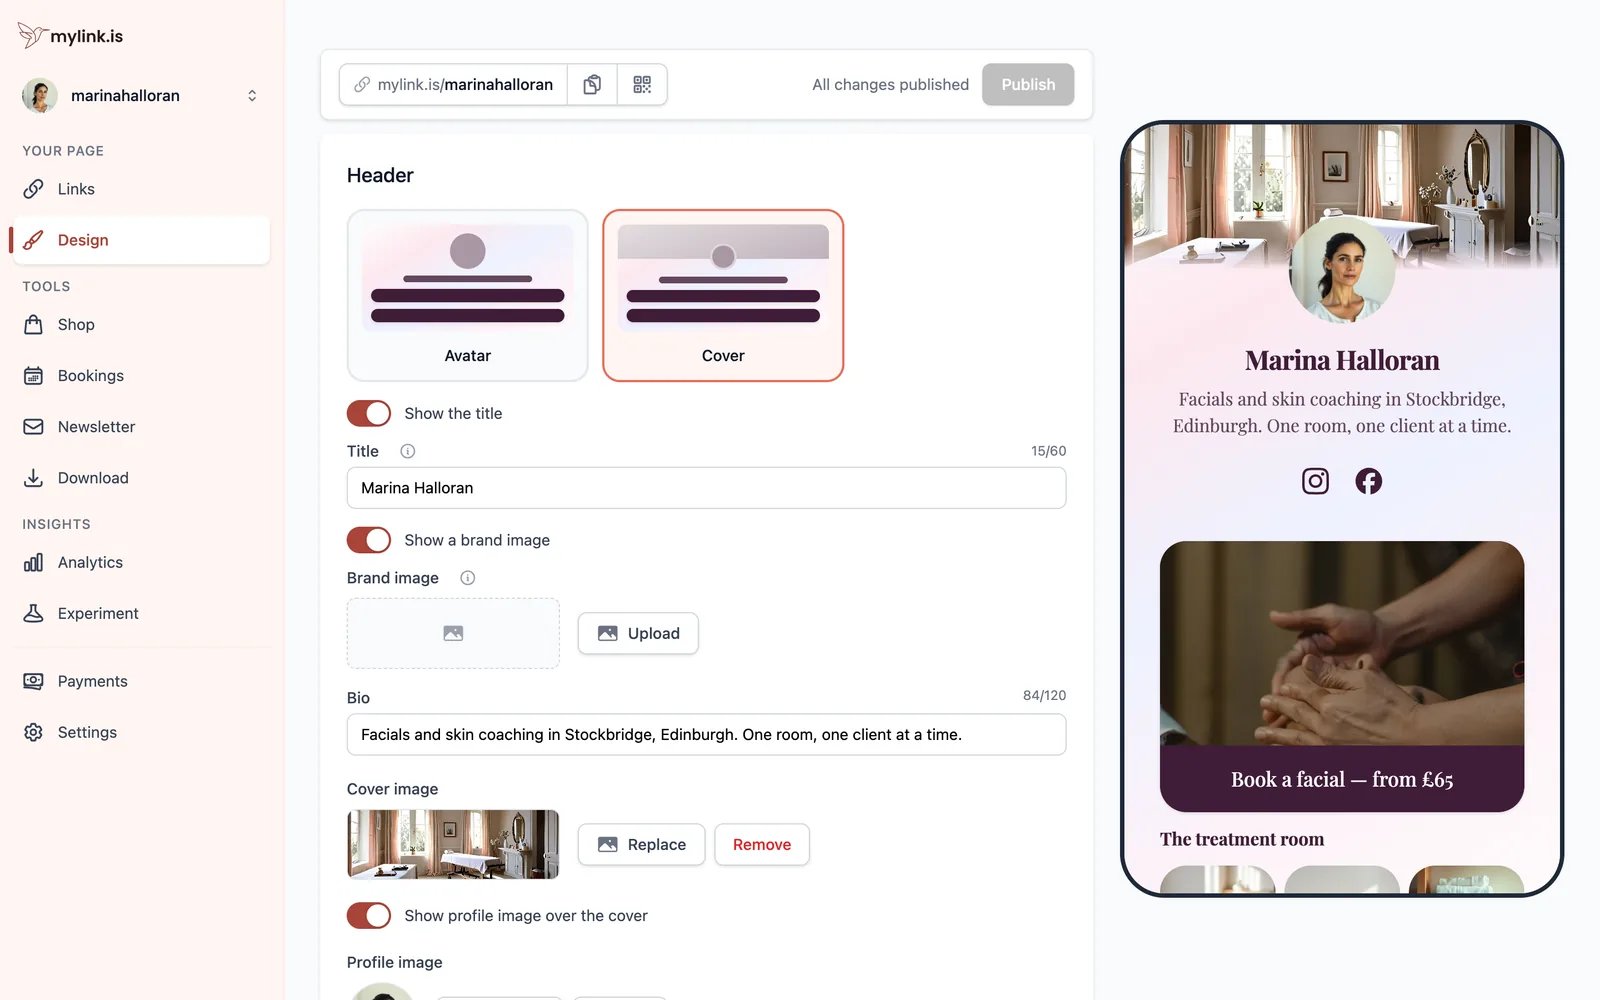
The rest of Design — colours, backdrop, fonts — can wait. A page with a clear header and three good links beats a beautiful page you never publish.
Add your first links
Go to Links and press Add to page. A link does not have to be a web address: it can dial your phone, open a WhatsApp chat, play a video on the page, show a map, or open a booking calendar you host here.
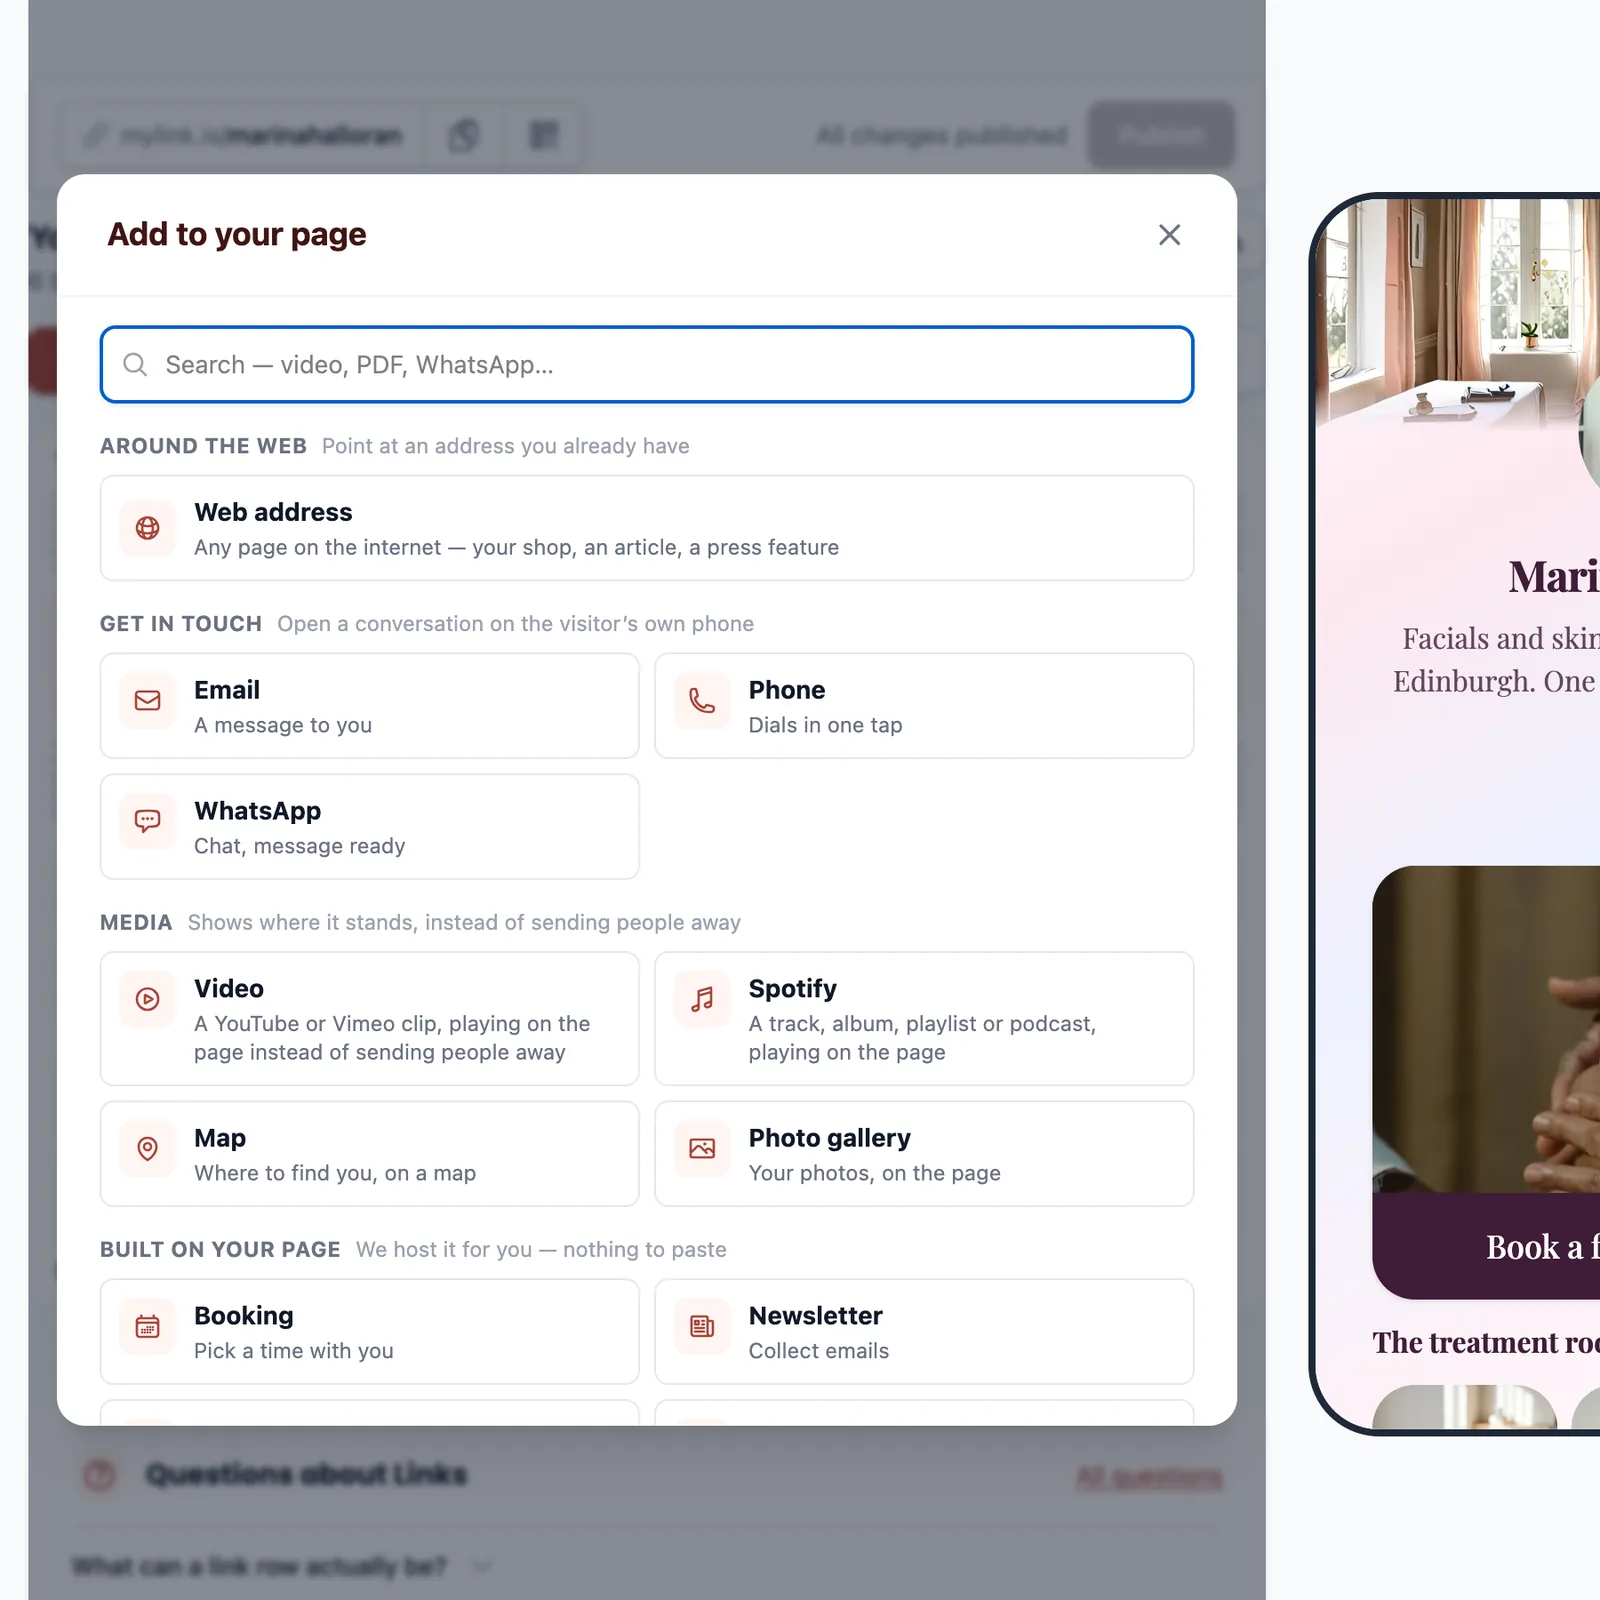
Start with three. The one you most want clicked goes first — attention falls off steeply down a list, and the row you added most recently is almost never the row that should be at the top. You can hold up to 50 on one page, but a page of thirty is a page nobody finishes.
Publish it
Links and Design edit a working copy. Nothing a visitor sees changes until you press Publish, which is what lets you rearrange half your page in the middle of the day without anyone watching you do it.

The tools further down the rail work the other way. Bookings, Newsletter, Download, Shop and Payments save the moment you change them and show No publishing needed where the button would be — there is no draft of an appointment book to hold back. The rule of thumb: if a section is drawn next to the phone preview, it publishes; if it is not, it is already live.
Put the link where people are
Copy the address from that same bar and paste it into every bio you have. The button next to it generates a QR code for anything printed — a menu, a card, a window.
Then check it the way a stranger would: open your page in a private window. Your own browser and the in-app browser inside a social app both keep copies we cannot reach, so the page you see is not always the page you shipped. That one habit settles most of the "I published and nothing changed" moments before they start.
What to set up next
A published page with good links is the whole job for a lot of people. The tools below are for when a link is not enough — when you want the visitor to book, buy or subscribe without leaving.
Ready to try it?
Your page is free to build, publish and share, and nothing in this guide costs anything.